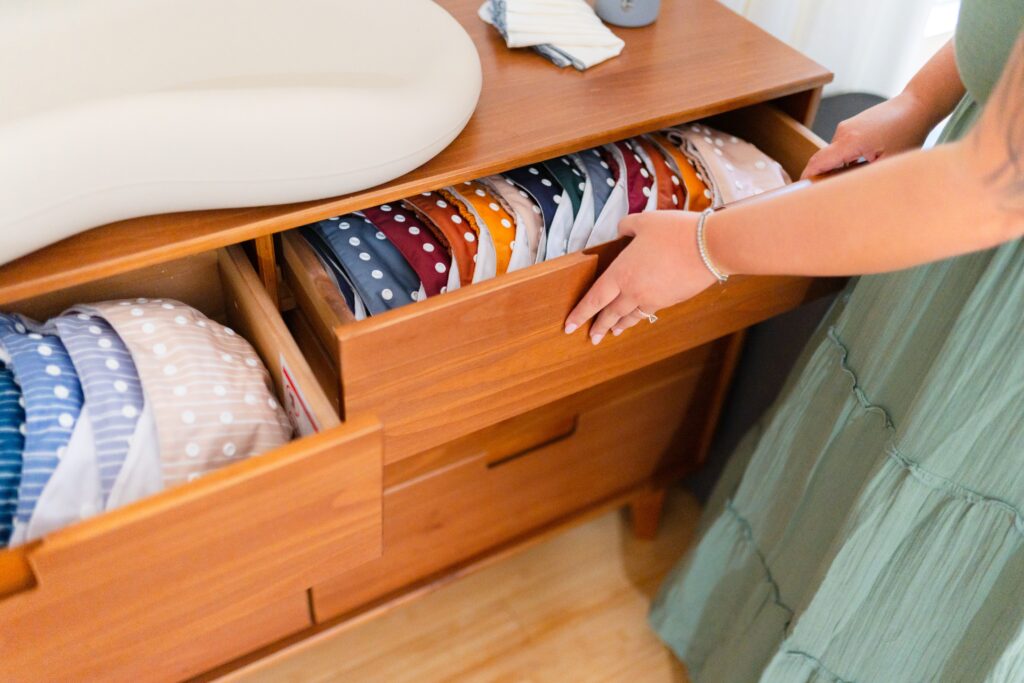
Baby changing tables are a wonderful – yet expensive – addition to any nursery.
Yet, when it comes to baby changing tables, there are a lot of options on the market. You can find them made out of everything from plastic to metal to wood.
So, what’s the best material for a changing table? We believe that wood is the best choice for a number of reasons.
Benefits of a wooden changing table
- First, wood is a very strong and durable material. It’s not going to warp or bend under the weight of a baby, and it can support a lot of weight. This is important because you don’t want your changing table to collapse while you’re using it.
- Second, wood is a natural material. This means that it’s not going to off-gas or release any harmful chemicals into the air. This is important for the health of both you and your baby.
- Third, wood is a beautiful material. It can add a touch of elegance to any nursery. Plus, it’s easy to clean and maintain.
- Fourth, wood is a sustainable material. This means that it’s environmentally friendly. If you’re looking for a changing table that’s going to last for years and years, wood is the best choice.
- Finally, wood is a very affordable material. You can find changing tables made out of wood for a fraction of the cost of other materials.
So, there you have it! These are just a few of the reasons why wood is the best material for a changing table. When you’re ready to buy your changing table, be sure to consider a wood changing table. You won’t be disappointed.
Pro tip #1
If you have a limited space, considering a room divider screen.
A room divider is an easy way to create a changing area for your baby that is separate from the rest of the room. You can purchase a room divider at site like Luxury Screens. Room dividers come in a variety of styles, so you can choose one that fits your changing room’s décor.
To use a room divider screen in a changing room for babies, first choose a spot in the room where you want to set up the divider. It is important to place the divider in an area where there is plenty of light so that you can see your baby while you are changing them. You will also want to make sure that the area is free from any sharp objects or furniture that could hurt your baby.
Once you have found the perfect spot, set up the room divider according to the manufacturer’s instructions. Once the divider is set up, you can begin to use it as a changing area. Place a changing pad on top of the divider and make sure that it is secure. You may also want to place a few toys or a mobile in the changing area so that your baby has something to look at while you are changing them.
When you are finished changing your baby, simply remove the changing pad and fold up the divider to put it away. Room dividers are an easy and convenient way to create a safe and comfortable changing area for your baby.
How to build your own changing table
Here’s what you need to get started.
Tools required: router, drill, sander
Wood required: pine and plywood
| Description | Qty | Width | Thickness | Length |
| Front frame | ||||
| Small verticals | 2 | 2 1/4″ | 3/4″ | 32″ |
| Long verticals | 2 | 2 1/4″ | 3/4″ | 35 1/2″ |
| Top/Middle long horizontals | 3 | 2 1/4″ | 3/4″ | 30 1/2″ |
| Base plank | 1 | 2 1/4″ | 3/4″ | 47″ |
| Top/Middle short horizontals | 2 | 2 1/4″ | 3/4″ | 14″ |
| Rear Frame | ||||
| Small verticals | 2 | 2 1/4″ | 3/4″ | 32″ |
| Long verticals | 2 | 2 1/4″ | 3/4″ | 35 1/2″ |
| Top long horizontals | 1 | 2 1/4″ | 3/4″ | 30 1/2″ |
| Base plank | 1 | 2 1/4″ | 3/4″ | 47″ |
| Top short horizontal | 1 | 2 1/4″ | 3/4″ | 14″ |
| Side panel (small) | ||||
| Verticals | 2 | 2 1/4″ | 3/4″ | 32″ |
| Top/bottom | 2 | 2 1/4″ | 3/4″ | 16 1/2″ |
| Side panel (large) | ||||
| Verticals | 2 | 2 1/4″ | 3/4″ | 35 1/2″ |
| Top/bottom | 2 | 2 1/4″ | 3/4″ | 16 1/2″ |
| Middle panel (plywood) | 1 | 16 1/2″ | 1/2″ | 4″ |
| Tops | ||||
| Large (plywood) | 1 | 19 1/2″ | 1/2″ | 34 1/4″ |
| Small (plywood) | 1 | 19 1/2″ | 1/2″ | 18 1/2″ |
| Edging (large top) | 1 | 3/4″ | 1/8″ | 55″ |
| Edging (small top) | 1 | 3/4″ | 1/8″ | 60″ |
| Molding (large top) | 1 | 3/4″ | 3/4″ | 55″ |
| Molding (small top) | 1 | 3/4″ | 3/4″ | 60″ |
| Base board | ||||
| Front | 1 | 3″ | 3/4″ | 51″ |
| Side | 2 | 3″ | 3/4″ | 19″ |
| Large drawers | ||||
| Sides | 6 | 5 1/2″ | 3/4″ | 16 1/2″ |
| Inner Front/back | 6 | 5 1/2″ | 3/4″ | 26″ |
| Front | 3 | 9″ | 3/4″ | 30 1/2″ |
| Knobs | 6 | |||
| Narrow drawers | ||||
| Sides | 4 | 10″ | 3/4″ | 16 1/2″ |
| Inner Front/back | 4 | 10″ | 3/4″ | 9 3/4″ |
| Front | 2 | 14″ | 3/4″ | 16 1/2″ |
| Knobs | 2 | |||
| Back panels | ||||
| Large (hardboard/plywood) | 1 | 32″ | 1/8″ | 32″ |
| Small (hardboard/plywood) | 1 | 16″ | 1/8″ | 35 1/2″ |
1. Prepare front frame pieces (left side)
Firstly, cut lap joints that are 1 1/2″ in from each end into the two top pieces (long and short), the middle drawer pieces (two long, one short) and the base plank. Next, cut a slot out of the base plank 13″ from the right and 29 1/2″ from the left (hence, 4 1/2″ wide). Note that when deciding which end is the right and left of this plank, lie the plank flat on the ground with the cut out lap joint part facing upwards (see diagram).
Now that all of the horizontal pieces are prepared, we need to prepare the vertical planks. Firstly, take one of the two shorter vertical pieces and nominate it as the left vertical. Cut out grooves that are 3/8″ deep and 1 1/2″ in (matching the cut on the horizontal pieces) at the following positions from the bottom:
- Bottom to 2 1/4″ high
- 10 3/4″ to 13″
- 20 1/2″ to 22 3/4″
- 29 3/4″ to top
Next, take the second small vertical and nominate it as the middle-right vertical. Make a mirror image of the above grooves in this piece, so that the horizontal planks will slot in. The one difference is that the base to 2 1/4″ high cut should be made as a lap joint (i.e. all the way across the wood, rather than just 1 1/2″ in) in order to slot into the middle groove cut out of the base plank.
2. Prepare front frame pieces (left side)
Now take one of the two longer vertical planks and nominate it as the right vertical. Cut out grooves that are 3/8″ deep and 1 1/2″ in (matching the cut on the horizontal pieces) at the following positions from the bottom:
- Bottom to 2 1/4″ high
- 17 1/2″ to 19 3/4″
- 33 1/4″ to top
Next, take the second long vertical and nominate it as the middle-left vertical. Make a mirror image of the above grooves in this piece, so that the horizontal planks will slot in. The one difference is that the base-to-2 1/4″ high cut should be made as a lap joint (i.e. all the way across the wood, rather than just 1 1/2″ in) in order to slot into the middle groove cut out of the base plank.
Finally, take the middle-right and taller middle-left planks and glue them together, side by side. To make this joint use either dowel joints or biscuits. The result should be a double width piece that has one side taller than the other. Not that when looking at this piece from the front, it should look like one solid piece – the grooves should be in the back, not the front.
3. Glue front frame together
Once the middle, double plank has dried, it is time to connect the rest of the front together. Glue and screw the pieces together, ensuring that the finished frame is square. To help build a solid frame, clamp overnight to ensure a strong bond.
4. Prepare back frame
The back frame is relatively simple to construct as it consists only of an outer frame. Repeat step 2, but omit the horizontal planks that define the drawer spaces (but include the inner-left and inner-right vertical planks that are glued together as on the front). One prepared, glue the pieces together (as with the front). Again, ensure that the frame is square.
5. Build left (small) side panel
Take the two vertical side pieces and cut lap joints into them, and matching lap joints in the two small horizontal pieces. By so doing, the four pieces should fit together into a rectangular frame (see diagram). Next, rout out a groove on the inner, back edge of all four pieces. This groove should cut in 1/2″ and be 1/2″ deep. By making this groove all the way around the inside edge, the plywood sheet that forms the side panel can rest in place. Once routed, glue and screw the four side planks together – making sure the joints are square – and then glue the plywood panel into place in the center (which will help strengthen the unit.
6. Build right (larger) side frame
Repeat step 5 for the right hand panel. Remember that this panel is larger due to the fact that the right side of the front frame is also taller.
7. Build main frame
Now that the two sides, front and back have been built, it is time to put them together. Sandwich the left hand side panel between the front and back panels and screw the three pieces together by driving screws through the front frame into the side as well as from the back frame into the side panel. Then attach the right hand panel to complete the frame. Make sure that the completed frame is square.
8. Add middle panel
Next, add the small middle panel, gluing and screwing it into place. This panel should fill the small void at the point where the front/back steps up from the lower height to the taller level. At this time you should also add a small strengthening bar to the bottom middle of the frame, running from front to back. To add it, glue and screw into place from the front and back.
9. Add tops
The final strengthening trick is adding to table tops. First add the larger, lower top. This should overhang the front and left hand side by 1″, over-hanging the back by 1/2″. To attach this top, glue and nail – or screw – down into the frame.
Add the smaller top to the higher part of the table next. Again, the overhang should be 1″ to the front and both sides.
10. Add edging strip and molding to top
Add the edging strip to front and sides of both tops. Use glue and small finishing nails to hold the strip into place against the plywood edge of the table top. Next, add the small molding to the meeting point between the top and the main frame, thus making the two look more like one unit.
11. Make base panel and attach to base.
To finish off the main unit we need to add a base board that will serve as feet. This is one solid plank that runs the entire length of the unit. Route a curve out of the top side to round it off (see diagram). Add to from and sides – using a mitered cut at each end – using screws and glue. The board should overlap 1″ with the frame, providing adequate bonding space.
12. Make drawers
Take the two side pieces, the back and the inner front piece. Cut a groove in each one that is 1/4″ from the bottom of each piece and is 1/4″ wide. This groove will allow the base to slot into the drawer frame. Once you have cut the groove, glue and screw the sides to the back piece, slot the base into the groove and then glue and crew the inner front board. Make sure that the unit is square. The result is a box without a lid.
Attach a 16″ drawer runner mechanism to each side of the drawer, and to the corresponding “hole” in the main unit of the chest. Ensure that all drawer mechanisms are attached at the same height, so that the drawers are interchangeable in the unit. To attach the runners to the main frame, you may need to add a strip of wood to the rear verticals.
Finally, you need to add the front of the drawer to the box unit. However, before doing this, you need to shape the front of the drawer. The edge of this should be rounded using the same router bit as you used for the edging around the bottom of the main unit. Once you have routed all four sides of the drawer front, attach it to the drawer unit by gluing and screwing from the inside of the drawer outwards.
13. Finishing
Finally, nail the two back panel pieces on to the back of the unit and sand the entire unit thoroughly and paint.